How to Add Dummy Content to a WordPress Website
Last Updated on: June 10, 2015 Shaun Quarton 5 Comments

It’s always exciting to install WordPress and your favorite theme on a fresh domain, isn’t it?
After just a few minutes of setup, you’re sat looking at a beautiful, unrestrictive blank canvas that you can mold into any type of website – the only limit is your imagination.
But not every WordPress user wants a blank canvas, however.
This is especially true if you’ve picked your theme because you liked the theme demo. Straight after installation, your website will look nothing like the demo, unfortunately.
If you’re an inexperienced WordPress user, this can be incredibly infuriating. You can spend hours scratching your head, trying to figure out how to get your website resembling the demo you fell in love with — I know the feeling, I’ve been there myself!
There is a quick solution to this predicament, though, and many theme developers are catching on to it: dummy content.
What is Dummy Content?
A WordPress theme is nothing without content.
As you’ve probably realized, if you install a theme on a fresh WordPress installation, there is no content – just a single post, page, and comment.
With no content to work with, even the best WordPress theme can look a bit lackluster.
Dummy content is a quick fix to this problem – a better word would be ‘demo’ content, though.
Dummy content takes the form of a simple XML file. Within this file, however, is loads of demo content that you can use to populate an empty website.
These days, many premium WordPress themes ship with dummy content. When you upload the dummy content file to your website, you are effectively uploading the same posts, pages, images, and settings you saw in the demo.
In other words, the dummy content can make your website look just like the theme demo you fell in love with, in just seconds.
This has a distinct advantage over building your website from scratch: the dummy content shows off all of the theme’s premium features with zero configuration on your part. You can then go through and change/delete the characteristics you don’t want, and keep the ones you do – this is a serious timesaver.
Once you’ve decided which to bin and which to keep, you can go about replacing images and rewriting text to make your website your own.
Dummy Content for Developers
But dummy content can take many forms – for example, you could export the content from your existing website to give a new project the basic content it needs. You can upload dummy content to any WordPress install, to quickly give yourself a full collection of posts, pages, and images.
This is especially important for WordPress theme developers – how do you know that your theme works properly if there’s no content on your website to test it?
Of course, it’s a real chore to add hundreds of complex posts and pages to a blank website — copying and pasting loads of Lorem Ipsom text won’t cut it for testing purposes.
Good news, then: Automattic (the people behind WordPress.com) have created a standardized dummy content file for theme developers – the Theme Unit Test. If you want to download the Theme Unit Test, just follow this link.
More than just dummy content, the Theme Unit Test puts your WordPress theme through the full range of functionalities – your theme will have to pass this test if it is to be included in the official WordPress directory. This includes testing:
- Posts display correctly
- Static front pages
- Different WordPress settings
- 404 pages
- Search results pages
- Blog posts index pages
- Different post formats
- WordPress tags and categories
- Different layouts, including HTML tags like H1, H2, H3, etc.
In other word, the Theme Unit Test includes a varied set of posts, pages, images, and settings that give your WordPress theme a complete workout.
How to Install Dummy Content
Now you know a little bit about dummy content, it’s time to show you how to install it on a WordPress website – don’t worry, it’s really easy to do.
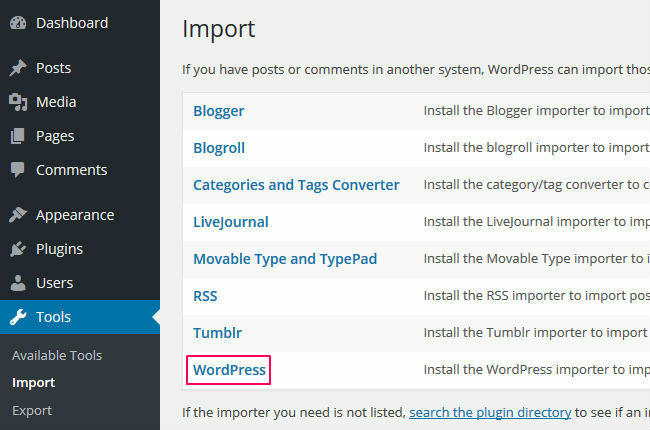
After logging in to WordPress, navigate to Tools > Import.
This screen will display all of WordPress’s tools to help you quickly and easily import a lot of data.
To import dummy content, however, you’ll need to select the WordPress option.
A pop-up window will appear, allowing you to quick-install the WordPress Importer plugin. Just click the Install Now button.
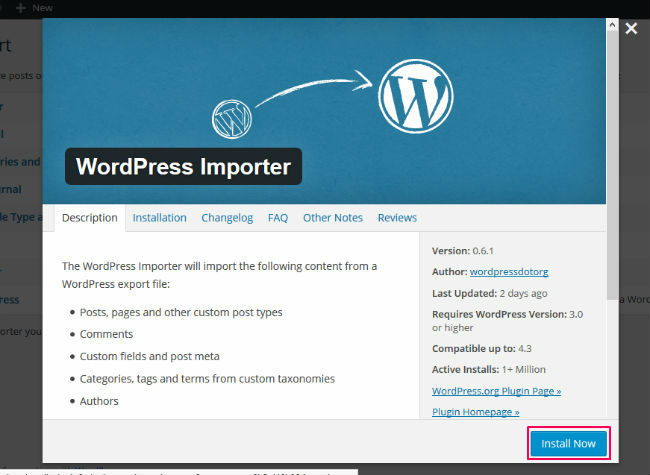
After the plugin is downloaded and installed, next you need to click the Activate Plugin & Run Importer button.